
Designing a high-waisted bikini bottom looks straightforward on paper—it’s essentially more coverage, right? In reality, high-waisted silhouettes are among the trickiest swimwear styles to get right in production. Because the garment extends all the way to the natural waist (or slightly above it), it interacts with the narrowest part of the torso, the belly, and the curve of the hips all at once.
If the pattern isn’t carefully balanced, you end up with gaping waistbands, fabric digging into the flesh, or a bottom that constantly shifts when the wearer moves. Here is how product developers and patternmakers navigate the technical details to turn a high-waisted concept into a well-fitting, production-ready style.
Start With the Intended Fit
Before laying down a single line on a draft, you need a clear definition of what “high-waisted” means for your target customer. Is this a retro, full-coverage piece that sits right at the navel, or a contemporary cut that hugs higher above the hip bones?
Establishing the target anchor point determines how the garment will behave in motion. A bottom designed to sit strictly at the natural waist relies heavily on the compression of the waistband to stay up. On the other hand, a mid-to-high rise style resting lower on the torso depends more on hip tension. Defining these parameters upfront saves you from adjusting basic proportions repeatedly during the sampling phase.
Balance the Front and Back Rise
One of the most common mistakes in high-waisted bikini patterns is simply extending the rise upward equally on both sides. The human torso isn’t a cylinder, and the front and back require completely different vertical proportions.
The front pattern piece must account for the natural curve of the lower abdomen without creating unnecessary horizontal fold lines. Meanwhile, the back rise needs enough vertical length to travel over the fullest part of the glutes before tapering back into the small of the waist. If the back rise is drafted too short, the waistband will pull downward, forcing the back coverage to shift into a cheekier fit than intended.
Shape the Waistband Around the Body
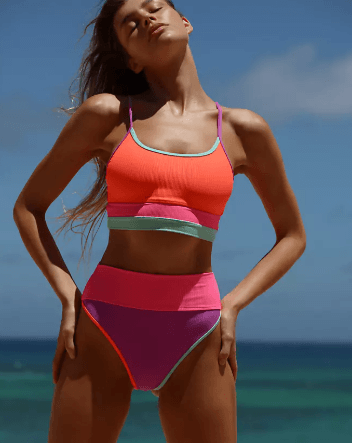
A flat, straight waistband works fine on standard low-rise bottoms, but on a high-waisted design, a straight strip of fabric often leads to a loose, gaping fit at the top edge.
To achieve a seamless contour:
- Curve the Pattern Pieces: Draft the top waistband area with a slight downward curve. This forces the upper edge to pull flatter against the lower ribs.
- Incorporate Differential Stretch: The top seam needs to hold closer to the skin than the lower portion of the panel to prevent slipping, especially when wet.
- Control Elastic Tension: The top elastic should be applied with slightly more tension than the body fabric to anchor the garment cleanly without causing the skin to pinch.
Build Enough Crotch and Seat Depth
A high-waisted cut inherently puts more vertical tension on the crotch panel. If there isn’t sufficient seat depth built into the central curve of the pattern, the garment will pull inward, resulting in uncomfortable wedgies or front-creasing.
Patternmakers adjust seat depth by tweaking the curvature of the center-back seam. A deeper, more angled back curve accommodates natural body volume and allows the fabric to sit flush against the lower back. This structural depth keeps the bottom anchored firmly during movement, so the wearer doesn’t feel the need to constantly adjust the fit.
Coordinate Leg Openings With Back Coverage
Leg line height and rear coverage are deeply intertwined—changing one almost always impacts the other.
A higher leg opening creates a longer visual leg line and a modern aesthetic, but it simultaneously slashes the functional surface area along the side seams and hips. When you raise the leg line on a high-waisted piece, the remaining back panel must be re-angled to secure the lower glutes. Without adjusting the back angle to match the open leg, the reduced coverage will cause the fabric to ride up as soon as the wearer starts walking.
Match the Pattern to Fabric and Elastic
A pattern that fits perfectly in a standard 200 GSM nylon-spandex blend might sag completely in a lightweight ribbed fabric or choke the body in a heavy textured Jacquard.
| Fabric / Trim Feature | Pattern Modification Needed | Production Impact |
| High Spandex Content (20%+) | Reduce stretch reduction percentage (grade smaller) | Provides firmer compression; ideal for sculpting silhouettes |
| Ribbed or Textured Knit | Increase internal elastic support; reduce panel width slightly | Prevents the fabric from expanding and losing shape in water |
| Clean-Finish Edges (No Foldover) | Use tighter internal elastic settings along leg openings | Maintains a smooth profile without sacrificing edge retention |
Because wet swimwear relaxes, elastic selection is critical. The leg and waist elastics must provide reliable recovery without creating hard ridges under clothing.
Identify Common Fit Problems During Sampling
During the first sample review, look beyond how the swimsuit looks on a stationary mannequin. Have a fit model sit, bend over, and stretch to expose mechanical flaws in the draft:
- Horizontal Wrinkles Across the Front: Indicates the front rise is too long, or there is excess fabric through the lower tummy area.
- Gaping at the Upper Waistband: Means the top opening lacks sufficient contour curve or the top elastic was applied too loose.
- Fabric Digging In at the Hips: Suggests the side seams are too narrow or the leg openings lack enough yield.
- Uneven Fabric Drag Lines at the Back: Shows that the back seam curve isn’t matching the wearer’s natural glute depth.
Diagnosing these issues on the physical sample allows you to refine the CAD files before committing to full-scale production.
Conclusion
Designing a high-waisted bikini bottom that feels as good as it looks comes down to respecting human anatomy and fabric behavior. By balancing front and back rise ratios, shaping the upper waist curve, and carefully calibrating elastic tensions, you can build a style that stays securely in place—both in and out of the water.